


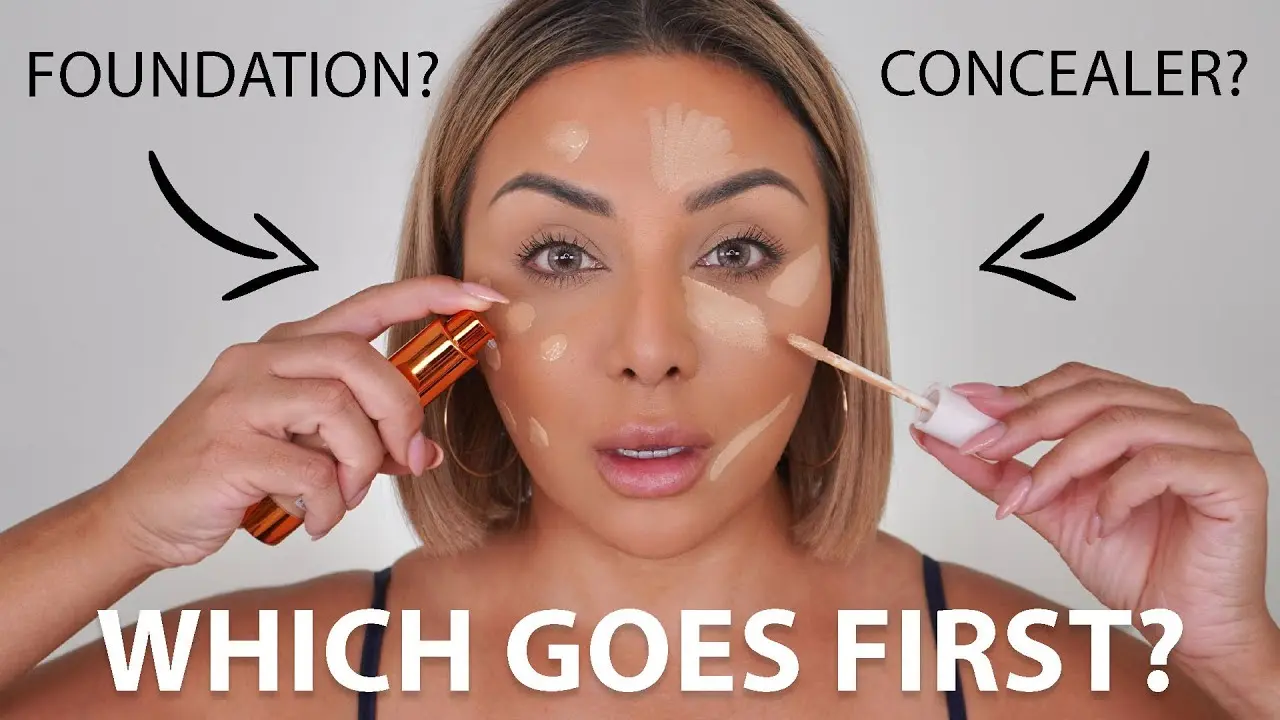
In the world of makeup most people say how and Where to Put Concealer, concealer is often the secret weapon to achieving that flawless complexion we all desire. Whether you’re covering dark circles, blemishes, or redness, concealer is a versatile product that can help you look fresh and radiant.
But knowing where and how to apply it can make all the difference in achieving a natural, seamless finish. In this guide, we’ll break down the best places to put concealer, how to apply it correctly, and the tips to get the most out of this essential makeup product.
Why Concealer Is a Must-Have in Your Makeup Kit
Concealer is an essential part of any makeup routine, and for good reason. Its primary function is to cover imperfections like blemishes, dark circles, redness, and even age spots. Unlike foundation, which covers a larger area, it focuses on targeted spots that need extra coverage. Its thicker consistency allows it to provide more concentrated coverage, which is perfect for problem areas.
Whether you’re going for a natural look or a full glam moment, concealer is a key player in achieving an even and smooth complexion. However, using it incorrectly can lead to a cakey or unnatural finish, so understanding where to place it is crucial.
Where Should You Put Concealer?
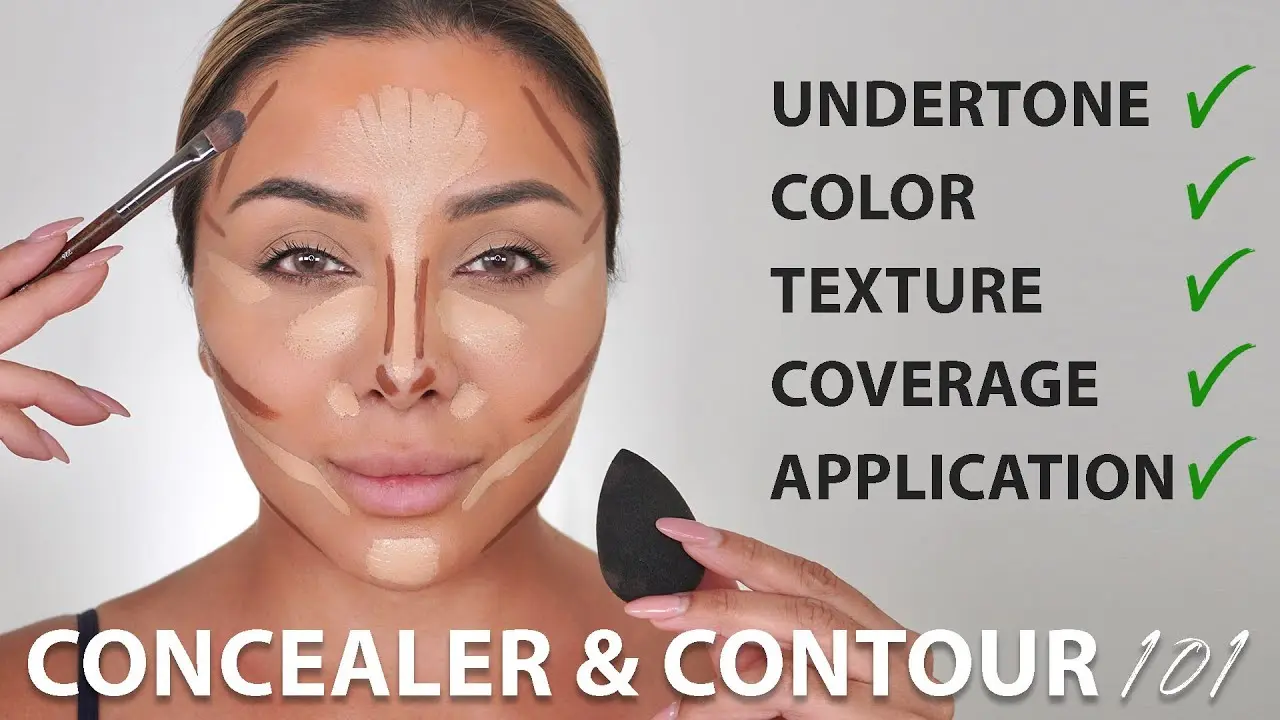
- Under Your Eyes The most common area for concealer application is under the eyes. Dark circles can make you look tired, but concealer can brighten up the area and give you a well-rested look. Apply it in an upside-down triangle shape under your eyes. This shape not only hides dark circles but also lifts and brightens the entire area. Remember to blend well to avoid a harsh line.
- On Blemishes and Pimples If you have a breakout or blemishes, it can help to cover them up. Apply a small amount of concealer directly onto the blemish and gently tap it with your fingertip or a makeup sponge to blend it in. Use a concealer that matches your skin tone for the best results. Avoid rubbing, as it can irritate the skin and make the blemish more noticeable.
- Around the Nose The area around your nose often gets red due to congestion or irritation. A little bit of it can work wonders to cover up this redness. Use a small brush or your fingertip to apply it around the sides of your nose. Gently blend it into the skin to create a seamless finish.
- On Your Chin Many people experience redness or breakouts on their chin. To conceal this area, dab a small amount of concealer onto your chin and blend it out. Be careful not to overdo it, as this can create a cakey look.
- On Your Eyelids It can also act as an eye primer, especially if you have discoloration or veins showing through your eyelids. Applying a thin layer of concealer can even out the skin tone on your eyelids and help your eyeshadow stay in place longer.
- To Highlight the High Points of Your Face Besides concealing imperfections, you can use a concealer one or two shades lighter than your skin tone to highlight certain areas of your face. Apply it to the bridge of your nose, the center of your forehead, and the tops of your cheekbones. This will help to brighten and lift the face, creating a natural glow.
How to Apply Concealer for a Flawless Finish
Now that you know where to apply concealer, it’s important to understand how to use it for the best results:
Step 1: Prep Your Skin Start with clean, moisturized skin. Concealer adheres best to a smooth surface, so using a lightweight moisturizer or primer can help the product go on evenly.
Step 2: Choose the Right Formula Choose a concealer that suits your skin type and needs. If you have dry skin, go for a hydrating formula. If you have oily skin, opt for a matte, oil-free concealer. Make sure the shade matches your skin tone or is slightly lighter for brightening purposes.
Step 3: It’s best to apply concealer in thin layers, building it up if needed. Start with a small amount and gradually layer until you achieve the coverage you desire. Using a beauty sponge or a concealer brush can help to blend it seamlessly into your skin.
Step 4: Blend, Blend, Blend Blending is key to a flawless concealer application. Use a damp beauty sponge or your fingertip to gently blend the concealer into your skin. Make sure there are no harsh lines or visible edges.
Step 5: Set with Powder To ensure your concealer stays put throughout the day, lightly dust a setting powder over the areas where you applied concealer. This will prevent it from creasing or settling into fine lines.
For More Details Please Read: Best Tinted Moisturizer
Concealer Tips and Tricks
- Color Correcting: If you have particularly stubborn dark circles, consider using a color-correcting concealer before applying your regular concealer. Peach or orange tones work best for blue-toned dark circles, while yellow or green can help with redness.
- Use a Concealer for Contouring: You can also use concealer to contour your face. A concealer a few shades darker than your skin tone can create natural-looking shadows along your jawline, under your cheekbones, and along your nose.
- Avoid Overapplying: It’s easy to overdo it with, especially when covering blemishes. Remember, a little goes a long way, and using too much can make the imperfection stand out more.
- Consider Your Skin Tone: For under-eye concealer, make sure to choose a shade that is slightly lighter than your skin tone to brighten the area. For blemishes or redness, choose a shade that matches your skin tone exactly.
Conclusion
Concealer is one of those makeup essentials that can make all the difference in achieving a flawless complexion. Whether you’re concealing dark circles, blemishes, or just brightening up your face, knowing where and how to apply it is key. With the right technique and a little practice, you’ll be able to master the art of concealing and create a smooth, radiant base that lasts all day. So, next time you reach for your concealer, remember these tips for a perfect, fresh-faced look.
