

How To Apply Blush To Oval Face- Blush is an essential product to use in every makeup routine. It brings warmth, vitality and a healthy luminosity to your skin and makes the face look young and fresh. However, when applying the blush, everyone doesn’t have the exact same method. Different facial shapes require differing approaches to get the perfect outcomes. If you have oval faces, using the correct amount of blush will enhance the natural beauty of your face and create an even, attractive appearance.
A face with an oval shape is usually believed to be the most adaptable and well-balanced face shape. It has a high cheekbone with a slight broader forehead and a softer jawline that makes it easy to play around with various ways to apply makeup. The application of blush on this contour can enhance your cheekbones and create an organic flush, as well as enhance the overall appearance the face. This guide will guide you on the process of applying blush to oval faces to make sure you have the most beautiful and natural look.
If you’re new to the world of makeup, or looking to perfect your techniques learning the best way to put blush the oval shape of your face is a crucial ability. Through the next few steps, we’ll teach how to apply the most effective techniques to apply tips and techniques to make maximum benefit from the blush you apply. We will dive into this world of blush to discover how to achieve stunning, radiant appearance that matches your facial contour perfect.
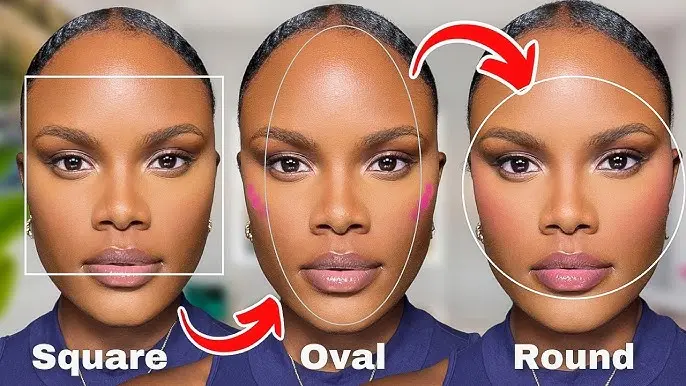
What is an Oval Face and Why Does It Matter for Blush Application?
A face that is oval is renowned due to its proportions that are balanced. The forehead has a little more width than the chin and the jawline appears soft and smooth. Faces with oval shapes tend to possess a high cheekbone that gives an organic contour and form. The symmetry of the face makes it easy for you to use blush in a manner that highlights your facial features without over-emphasizing one particular area.

For those with oval faces What is important when applying blush is creating an attractive, healthy complexion which enhances the natural contour and shape of your face. The aim is to enhance the cheekbones while adding an ambiance of warmth without affecting the harmony. Contrary to other shapes of the face that might require a more defined contour or precise blush placement An oval-shaped face gives you more freedom, and allows the user to play around with various methods to create a range of styles.
Step-by-Step Guide: How To Apply Blush To Oval Face
Step 1: Choose the Right Blush Shade
The initial step in apply blush on an oval face is selecting the appropriate blush color to match the skin shade. A shade that is appropriate will improve the appearance of your skin and provide a the natural radiant glowing look. Here are a few tips to match your skin tone:
- Fair Skin: Peach-toned soft pinks, soft pinks as well as light shades of rose are the well. These colors give natural, natural-looking flush to the cheeks, without obscuring the complexion.
- Medium Skin: The peach, coral and warm shades of rose work well on moderate skin tones. These colors complement the natural warmth of your skin. They create a radiant, healthy sun-kissed skin.
- Dark Skin: A rich plum, berry and rich peach hues can be incredibly effective on skin with darker tones. The shades highlight the warmth and brightness of your skin. They create striking, luminous skin.
When selecting a blush, always consider the undertones of your skin. Choose a color that complements your skin’s undertone to get the most flattering result.
Step 2: Prep Your Skin
Prior to applying blush, be sure that your skin is clean and ready to apply makeup. Wash and moisturize your face so that your skin feels silky and soft. Apply foundation, concealer and the other products for base makeup you usually apply. Applying a setting powder is not required, but it could make the blush last longer, particularly if you are prone to oily skin.
Step 3: Select Your Blush Application Tool
The tool you use to apply blush plays a crucial role in achieving a flawless finish. Here’s how to select the right tool based on the type of blush you’re using:
- Powder Blush: A soft blush brush can be used to apply powder blush. If you prefer more control, go with smaller brushes with angled edges. It allows you to place your blush exactly in the areas you prefer.
- Cream or Gel Blush: To apply gel or cream blushes, you can make use of your fingertips as well as a makeup sponge or an Stippling brush. They allow a smooth applications that are even and make the product blend with your skin to give a natural-looking finish.
Step 4: Find the Right Placement for Blush
The placement of the blush is crucial when applying blush on the face that is oval. As oval faces have a balanced appearance The goal is to emphasize the cheekbones, and bring some warmth for the complexion. Here’s how for applying blush
- The Smile and Apply Technique: Make sure you smile to see the cheeks’ apples. Apply blush directly onto the apples, and blend the blush outward towards the temples. This gives your face a an unnatural, youthful appearance.
- Cheekbone Enhancement: To create a more defined look make sure you apply the blush a little lower over the cheekbones. Mix the blush upwards and outward to create a lifted look that emphasizes the natural bone shape.
These two methods are efficient, however it’s up to you which type of appearance you’d like to create. If you want a natural, easy style, a application technique and smile works well. If you want a more defined appearance opt for the method of enhancing your cheekbones.
Step 5: Apply the Blush
Now it’s time to apply the blush. The method will vary depending on the type of blush you’re using:
- For Powder Blush: Make sure you swirl your brush around in the powder, then wipe off excess powder, then carefully apply the blush to the cheeks’ apples. Apply the blush to the temples with small circular movements. Be sure to increase your color slowly so that you don’t get a glam look.
- For Cream or Gel Blush: Begin by applying a tiny amount of the product onto your sponge or fingers. Rub it on your cheeks’ apples and then blend it inward. Apply more if you need to Be careful not to use too much at one time.
Step 6: Blend for a Seamless Look
Blending is vital in the application of blush. If you a0re using cream blush, powder blush, or gel, mixing will give you an organic, seamless look. Make use of a soft brush or makeup sponge blend the blush on the skin. Beware of streaks or lines when you blend the blush using circular movements. The aim is to make a an elegant, soft blush that appears natural and easy.
Step 7: Set the Blush (Optional)
If you want to ensure that the color lasts throughout the throughout the day, apply it by lightly dusting of shimmering powder. This can be particularly beneficial for those with an oily complexion or live located in an area with high temperatures. The setting of the blush with powder will ensure that it remains intact and doesn’t fade throughout the entire day.
You May Also Read: How To Blend Eyeshadow Like A Pro?
Tips for the Perfect Blush Application
- Start light: When applying blush, start with a small amount and build it up gradually. It’s easier to add more blush than to remove excess.
- Blend well: Always blend your blush to ensure it looks natural and seamless.
- Use blush as a highlighter: Some cream blushes with a shimmer can also serve as a subtle highlighter, adding glow to your cheekbones.
- Consider the rest of your makeup: Balance bold eye makeup or lip color with a softer blush, and vice versa.
Common Blush Mistakes to Avoid
- Over-applying: Applying too much blush can make you look harsh. Start with a light touch and build the color gradually.
- Ignoring blending: Blending is crucial for achieving a natural, radiant look. Don’t leave harsh lines.
- Choosing the wrong shade: Make sure you choose a blush that suits your skin tone. The wrong shade can clash with your complexion.
Conclusion
Learning the best way to apply blush on an oval-shaped face will improve your makeup skills and aid to achieve a radiant, natural-looking look. When you choose the correct color, applying the blush to your skin and selecting appropriate tools, and applying it with the proper methods, you will be able to highlight your cheekbones, and improve the overall symmetry in your appearance. If you like a soft blush or an intense splash of color, these guidelines will guarantee that you achieve the ideal appearance every time. After a bit of practice and practice, you’ll learn the art of blushing and achieve a stunning and beautiful look that compliments the shape of your face.
